Showing posts with label Trailer. Show all posts

Sunday, June 09, 2013

Spindle Camp 2013

It was warm. Really warm.


It was also great fun.  We hung out and spun/knitted/chatted/ate/drank/laughed and hung out in Lake Francis during a record-breaking heat wave. Some folks made great progress on projects.  I miscalculated a bit by bringing a nearly finished wool shawl to knit. No matter how light and airy, a lapful of wool in 104 degree heat is a bad idea. So I mostly spun cotton on a takli.  I did bring the firebird wheel, but didn't use it much either. Progress was not really the point anyway; it was all about laughing, chatting and sharing ideas with other fiber addicts.


Some folks brought stuff to sell.  Sharon wove these gorgeous towels that I snapped up for the little trailer.


We had a "pirate" exchange and I am going home with some great yarn. 

Here's a video Lucy took of Barbara Sue:

Wednesday, October 05, 2011

Vintage Trailer Fun

Last weekend was the Tin Can Tourists Northern California Regional Rally at Coloma, CA. There were 40ish (I didn't count) vintage trailers parked along the bank of the South Fork of the American River. Events included chili cook-off, potluck, open trailer hours, and lots of visiting. This is only my second year, so it was good to get to know these super-friendly people better. The main event that everyone looks forward to is the trailer open-house. Just like an upscale "Parade of Homes", folks prepare their trailers to be seen, setting out their collections of vintage place-settings and period artifacts. The trailers ranged from the 1940s to the 1970s, and from tiny teardrops to 25ft-plus in length. Although many were meticulously restored with period-perfect details, others were projects in process. Mine was one of the least period-conscious, since she is renovated rather than restored, but still managed to earn plenty of positive feedback on her artsy coziness.

I, of course, took lots of pictures, particularly of interior details. You can see the whole set HERE.

As you can see, vintage trailer buffs are great fans of eBay. There was much talk of scores they had made. I brought along my vintage bicycle and enjoyed tooling about the campground until Sunday, when I sadly suffered a tire blow-out.

I returned home Monday morning, just as the weather turned cold. As I type this it is raining, expected to turn to snow before morning.


Sunday, August 21, 2011

A Cookbook for the Little Trailer

I was recently gifted with this wonderful little cookbook. It was produced by the National Museum of Forest Service History and includes about 150 recipes from rangers, Forest Service newsletters, and other sources from the history of the Forest Service. Name an ingredient, any ingredient, and this book will probably tell you how to cook it in a dutch oven. Although I don't expect I will be making 'Great Basin Rattlesnake' or 'Depression Bologna Gravy', and I can't imagine wanting to eat 'Campsite Lima Beans' while on vacation, there are some wonderful looking simple hearty dishes described. I am puzzled by the recipe that starts with "Make mashed potatoes the way you usually make them on a camping trip" (really?) but can definitely see myself making the 'Spoon Bread' which includes corn muffin mix, blue cheese crumbles and bacon, or the 5-ingredient dutch oven 'Chili Verde'.

What makes this book absolutely wonderful though, is that it is packed with historic photographs of campers and campgrounds, most from the 1920s through 1950s. (Even a few showcasing 1950s trailers!) And scattered throughout the recipes are historical notes and stories about the rangers, foresters and fire crews that have protected our forests for the last hundred years.

I love this book!

Monday, November 08, 2010

2010 Camping Review

Now that winter is here, I am looking forward to next summer's camping adventures. Before I pull out the campground guides and begin planning, here is a quick review of the little trailer's 2010 activity:

Due to travel for work, I didn't get any camping in until the 1st Intermountain Spindle Camp in May. It was a very wet joint campout of the Foothills Fiber Guild and the Carson Sierra Spinners and Weavers. A few pictures from the trip can be seen here and here. Despite the rain and cold, it was tons of fun. I was bummed to discover today that I have a conflict and won't be able to attend next year's Spindle Camp.

Independence Day weekend I took the little trailer up to Sharon and Ian's Sage Creek Farm for a very relaxing short stay. As far as I can tell, I didn't take any pictures, but I promise you I had a lovely time.

The big trip this year occurred in August. My Dad came up to Reno and we traveled together over to Salt Lake City for my Nephew's wedding. Afterward we continued on to Yellowstone National Park and camped for 5 nights in Madison Campground. Not only did we travel all around the park seeing geysers, glaciers, bears and elk, we also spent a day visiting the Grand Tetons. Magnificent country! Blossom only sleeps one, so Dad brought his tent. The 1953 trailer fit perfectly in the nation's first National Park. (In fact, chances are she has been there before!)

Next it was back to Sage Creek Farm for the annual Labor Day Gathering. Good food, great friends, lots of laughter, knitting, crystal hunting, giant Jenga, and the traditional visit to Joe Winter's pottery studio. As always, the little trailer looked truly tiny parked next to the giant 5th wheel.

The very next weekend was the Spinning Guild's annual Spinsters' Retreat at Davis Creek Park. Several of us camped in the Group site, while others came for just the day. It is nice to have a great little pine-shaded campground so close to Reno.

The last trailer trip of 2010 was to Coloma, CA for the Tin Can Tourists Northern California Regional Gathering. This was my first time at a TCT vintage trailer rally and I wasn't sure what to expect. It was so very exciting to drive up and see all the little trailers lined up! Saturday was trailer open house and I spent hours investigating each of the trailers. I took scads of pictures. Everyone was incredibly friendly and I didn't feel at all like a newbie. Blossom was one of the smallest trailers there, and folks were very nice about complimenting her refurbished interior, though most of these folks go to a lot of effort to restore their trailers to original fittings. I bought a very cool vintage bicycle from the folks in the trailer next door that I can take with me on future road trips. The campground was inside the Marshall Gold Discovery Park and right on the bank of the South Fork of the American River. It was exceptionally hot for October, so it was great to be able to scuttle down the bank right there at my campsite and sit on a rock with my feet in the river. I stayed an extra day and was able to do some exploring in Placerville, as well as get in some photography in the local historical cemetery.

That wraps up the trailer year. I've gotten pretty good at backing her, and can be ready to hit the road in no time at all. In 2012 I hope to get out earlier and am planning a first trip for April, weather permitting. Or even a weekend in March if we get unseasonably warm weather....

Tuesday, June 01, 2010

1st Intermountain Spindle Camp

I am miles behind on reporting on the 1st Intermountain Spindle Camp at Lake Francis, CA. You can see my pictures here. Sharon, Heidi, and Birdsong have all blogged on the event. (Thanks, Birdsong, for the great review of my trailer! I love showing her off!) The brief summary of the events is that we all had tons of fun despite cold, rain, and hail. In fact, it was so much fun that we are already planning next year's Spindle Camp! I stayed behind and camped 2 more nights. What a great campground! It even had a restaurant that served a great lobster fettuccine! It was still a bit chilly for sitting around the campsite, so I took a few drives around the area to get in a little photography. The picture above is of the little Lake Francis and taken from a path down from the campground. I also visited the cemetery in Dobbins, and the old downtown area of Marysville. Driving home Tuesday, I stopped by the cemetery in Vinton. For photography, the Vinton cemetery is a bit disappointing, since it is so well maintained. (The tidy state of it says good things about the people of Vinton, but crumbling headstones are a bit more atmospheric.) I am still going through the images, so you will have to wait a bit before they debut on Flickr.

Thursday, May 20, 2010

Last big items....

Racing the clock to get the little trailer ready for her first trip of 2010, I needed to tackle the last two items remaining to make her renovation complete. Yes, I will always be adjusting and adding artsy touches, but the lack of flooring other than raw plywood made her look like a construction zone. I pondered long and searched the internet in vane for the right flooring solution. Several people recommended vinyl squares, and I did look at them, but they were all ugly refugees from the early eighties. Even as a temporary solution, I couldn't do that to my Blossom. I wanted something smooth, easy care, and dark brown to match the counters. I decided to paint the floor. Painted floors have long been a feature of summer cottages, so why not? Worst case scenario it would be an inexpensive temporary solution until I found something better.

Process: I wanted the rustic wood texture to show so I only slightly sanded the plywood. I primed with a coat of tinted primer, then applied 3 full coats of dark brown porch and deck latex paint (wow, that stuff is rubbery!). I just couldn't help adding a folkart flourish, so I used copper metallic artist acrylic to paint stars. Last I added 2 coats of spar varnish to seal in the stars and give a less rubbery surface.

I am totally thrilled with the result. It is way better than I expected and the copper picks up the other copper elements (lamps and backsplash). It might be too much for some folks, but for me it is perfect. Oh - the second finishing touch was to install a custom made (wood burned and painted, of course) set of coat hooks, that matches the custom painted cabinet knobs.

Now I'm ready to fill her up and hit the road!

Friday, April 09, 2010

Second Trailer Light

Remember the reading lamp I built for over the bed in my trailer? I needed to build a mate for it for over the desk. Where the wiring is installed above the shelving unit is not really optimal for a desk lamp. With both 12 volt and standard outlets on the desk, I really don't need a wall mounted desk lamp anyway. Instead I have built another copper-shaded light, this time more for ambiance lighting.

I found a sheet of embossing copper at Nevada Fine Arts. This was way easier to work with than the copper-leafing over foil that I used for the first light. This time I built the shade's hardware cloth frame in a simple retro-ish half column. I covered the hardware cloth with the copper, pushing it into the grid for texture. Between the two coats of metal sealer, I used a pushpin to poke holes in each of the hardware cloth squares.

From a functional point of view, it is a totally unnecessary light. Doesn't matter - I think it is cool. I especially like the sun pattern the light casts in the ceiling. And since the LED panel came from inside a boat light, I can even switch the light to red for a nightlight.

Now I only need to find the perfect flooring and she will be complete!

Sunday, February 28, 2010

Lighting Project


It has been a bit since I have done any work on the little trailer. All that snow and frigid weather has kept my focus indoors. One of the remaining projects after her renovation was to install a reading light above the bed. Much searching failed to find a 12volt light fixture that both ran on low voltage LEDs and didn't look too modern and/or plastic. I particularly wanted to have some textured copper to balance the beaten copper backsplash in the trailer's tiny kitchen area.

So I decided to build my own artsy fixture.

I purchased an inexpensive 12volt LED dome light from a boat supply store. The LED circuit board inside was the right size to fit neatly in one of the picture frames I had already wood-burned and painted. I used a piece of MDF the size of the frame as a base. I drilled a hole for the wires, then painted the edges orange and the face with iridescent gold paint. The iridescent paint is to help reflect the light out from under the shade. (Why gold? Because I had it on hand.) I varnished the board, then attached the frame to it with screws from the back. The inset in the frame meant to hold the glass made a neat slot to fit in the shade. I attached the LED board with its original screws and glued down the switch.

To achieve a textured copper shade, I built a frame out of hardware cloth. I covered the frame with heavy-duty recycled aluminum foil, being careful to cover the inside with the shiny side out to reflect light. I pressed the aluminum into the hardware cloth for maximum texture. At this point it looked pretty disappointing, but I pressed on anyway. I brushed sizing all over the outside of the shade, then applied copper leaf. It took about 3 applications since the texture made leafing difficult. When I reached the point of good enough, I coated the shade with copper sealant, and left it to dry overnight.

Here it is, screwed securely to the trailer wall. Having little experience with electrical things, it was indescribably satisfying to flip the switch and see the light come on!


Monday, October 19, 2009

Relaxing weekend

This picture was Saturday. Sunday turned windy, so picture it without the awning.

Sunday, October 11, 2009

More Trailer details

In addition to attending a very enjoyable spinning guild meeting, I was able to spend much of the weekend working on some finishing touches for the trailer. The rebuild provided additional storage cabinets, but wouldn't you know it Home Depot has discontinued the existing cabinet hardware?! I took this as an opportunity and bought unfinished wood knobs to decorate. I like the results so much that I think I'll do some for my bedroom, too. I also burned and painted some outlet plates. The new mattress is in place, along with featherbed and new purple sheets. I installed some new latches on the under bed storage door to keep it from flying open in transit and I added a baby-lock to the rear hatch so that it can be propped open just enough for electrical plug-in. Still need to find flooring and two 12-volt reading lights.

She is looking so cozy that I can't wait to take her on the road!

Monday, October 05, 2009

A peek at the inside

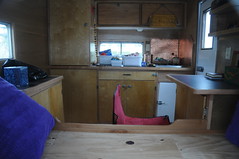
The little 1953 trailer is home. I have just started to fill her up with all the bits and pieces of camping. She still needs a mattress, flooring, 2 light fixtures, and a few other things. Here is a picture taken through the back window.

Friday, September 18, 2009

Making a Splash (backsplash that is)

The little trailer is moving along. The outside is done, the inside is paneled, and the stove and counter top have arrived. I turn my attention to a backsplash around the stove area. Tile and a bumpy road -- um, no. Formica-ish stuff - super-yuck. I actually considered lining the area with some of the cast-off outer aluminum, but Pete confirmed my concern that it would oxidize and be unworkable. He suggested copper since it would look great with the birch paneling and would patina nicely. Smooth copper would be too techy-modern for me. I decided to purchase copper sheeting and beat the bejeezus out of it.

I didn't know how much work this would be.

Acquiring the sheeting was a story in itself. The man at the sheet metal store told me that yes, they had it, but "that stuff is like gold - really expensive." Furthermore, when informed of my backsplash intentions, he told me I would regret it and it would gather dust and I really should reconsider. Since the office at this place had dust piles and spiderwebs in all the corners, it seemed unlikely that he could be a compulsive duster. Hmm... I assured him that I was determined to buy copper, so he rang up my $47 worth of "just like gold". As I handed over the cash he said that business is really slow and and he might as well just go home. I left Eeyore in his dusty office and escaped with my copper.

Next came the pounding. I had naively assembled a variety of objects to pound with in hopes of creating interesting patterns. None made so much as a dent except the balpeen hammer. Okey doke - a simple hammer job should look kinda rustic and catch the light nicely.

Much, much work. Leaving the plastic coating on to avoid scratches, I wailed away at the two sheets, frequently flipping them to beat on the other side to keep them relatively flat. A sheepskin on top of a solid wood chair made a nice solid work surface with just enough give. If you try this, I recommend frequent rest periods. Despite the stiff shoulder, the effect is worth it. I'll deliver the panels for installation on Sunday.

Saturday, September 12, 2009

Progress


The outside is mostly done. Doesn't she look amazing?!

Thursday, August 20, 2009

Surrender

Every DIYer has to occasionally give in to the reality that it is not always possible or practical to accomplish every project alone. The extent of water damage in the little trailer, and the fact that it won't fit through the garage door (tall 1950's trailer and short 1950's garage door) led me to seek professional help. (No, not the psychological kind, at least not so far.) I sought out the skills of Pete and Joseph of Sierra Trailer Restoration, just over the "hill" in Nevada City, CA. They specialize in restoring vintage Airstreams, but are happy to work on "canned hams" as well. Last Saturday I delivered the trailer into their capable hands, leaving her a veritable dwarf among a collection of giant silver Airstreams. Tuesday evening Pete called to warn me not to panic when I received the forthcoming pictures. Here she is, laid bare to the bones. This weekend I will zip back over the hill so we can discuss options for the rebuild.


Monday, August 10, 2009

Ugh!

In a burst of energy I decided to pull down the rest of the wallpaper on the ceiling of the little trailer. Yikes! Seems I have a few leaks. That's the aluminum outer skin you can see through the hole in the last picture. I've got lots of work ahead of me!