Sunday, August 22, 2010

Who am I?

This cute little badly-neglected spinning wheel has come to live at my house. It is in pretty rough shape, but I think I can get it working with a hefty bit of TLC. Someone has left it out in the rain, but happily the wheel is not warped.
I've never seen one like it. In most ways it looks like a home-built, but the orifice and a few other bits look commercial. Anybody out there recognize the maker? It is double-drive, the flyer whorl screws onto the spindle, and the mother-of-all is hinged to flop to the side (similar to an Ashford Traveler).

Wednesday, July 14, 2010

Phone camera improvement

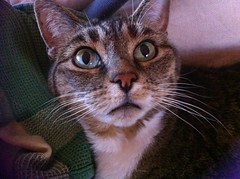
I've been playing with the camera in my new iPhone 4. It is pretty impressive - 5 megapixel, with zoom and manual spot focusing capabilities. I checked the native size on an uncropped image and it should be sharp to about 28x36 inches. The colors, white balance and low light handling are way better than in the iPhone 3G.This image of Clara I snapped in low light. Pretty impressive for a pinhole of a lens!

Saturday, June 26, 2010

My new favorite place

When the neighbors cut down their (perfectly healthy) cherry tree, they left my yard furniture without shade or privacy. I took it as a sign to get on with renovating the back porch, which was being used for storage of accumulated junk. I moved the futon couch out of the house onto the porch. Whoever decided futons should not have handles should be shot. (Laura and I have had this conversation before when we moved her giant marshmallow, and we had two people moving it.) I had to take the frame apart to get it out and down the hall. I am feeling a bit smug that I easily found the directions and original hex wrench that came with the futon frame.

The porch is now about as comfy as it could be. I may just have to sleep out there tonight. Meanwhile, time to make some limeade and settle in with some knitting....

Wednesday, June 23, 2010

Oh Canada!

How the spring has flown by! Between trips for work, trips for fun, and a bout or two of fluish stuff I have become a very bad blogger.

My latest adventure was a trip to Calgary, Canada. I went primarily for work stuff, but I had a couple of days to play at the end. Prior to the trip, the internet weather gurus predicted a solid week of rain. Happily the sun came out for a glorious day-trip to Banff. We took the Banff Gondola up the mountain and climbed the long boardwalk trail up to the very top. Amazing view! I took about a zillian pictures and am still going through them. If you go to Alberta, no question - you MUST make the pilgrimage to Banff. The town of Banff is pretty touristy/gift-shoppy, but it does advertise "Canada's Best Ice Cream" (as reported by Readers Digest) at a shop called Cows. I had the "Gooey Mooey" flavor and it was mighty tasty! My favorite shopping was the downtown area of Canmore, a small town on the way to Banff. It had a great little independant bookstore called "Cafe Books" that features crafts by local artisans along with a great collection of environmental titles. I bought a nifty little book, The Incomparable Honeybee, and another hand-thrown lidded jar for my (already full) kitchen counter.

The second play day was spent in Calgary. The clouds had rolled back in and rain was continually threatened. I devoted the morning to photography and spent it exploring the Union Cemetery and the Chinese Cemetery. The Union Cemetery is quite large and parts of it have a great view of the Calgary downtown skyline. I have photographed a number of cemeteries and I was interested in differences that might be found in Canadian cemeteries. With just Calgary to go by, I did notice how few statues or carvings of human figures were to be found among the stones.

I took the pedestrian bridge over the freeway to get to the small Chinese Cemetery. Although many of the markers contained only Chinese characters, some had dates I could read. Like the Union Cemetery, the Chinese Cemetery dates back to the late 1800s, yet includes relatively recent burials as well. I do not know the details of its history, but its location, size, and condition paint a clear picture of the social outsider status these folks unfortunately had.

After several hours wandering the cemeteries, I decided to get a late lunch at the Reader's Garden Cafe. The Reader's Rock Garden is adjacent to the Union Cemetery and was the serendipitous find of my trip. I only stumbled on it by virtue of it sharing the parking lot with the cemetery. The garden and its cafe are run by the Calgary Horticultural Society. It stretches all along a hillside, with flagstone paths, rock steps, rustic benches and grassy grottoes filled with flowers and shrubs, and trees. Even with the gray skies it was a magical place. The Cafe is in a charismatic old house. I got to sit near a wonderful rock fireplace and eat shepherd's pie made with Alberta-grown buffalo, then take home lemon-poppyseed cake with strawberries to have with my evening tea. Heaven.

Tuesday I had some time free before heading to the airport. I drove south of Calgary to the town of DeWinton to visit Shuttleworks. Shuttleworks sells fiberarts supplies from a large metal barn of a building out on a piece of farmland. The modest outside view does not do justice to the wonders within. The place is packed with possibly the best selection of fiber stuff I have seen anywhere.
I especially loved the books, which included many I hadn't seen before, and some that I know are out-of-print and hard to find. I added 2 spindles and a sample niddy made by Edward Tabachek to my collection, along with a couple books and a small bag of ultra-white corn silk. I would have bought more if I could have fit it into my luggage. (Sara - notice one of the books being highlighted?!)
After shopping I spent an hour or so chatting with the owner about everything from the local fiberarts scene to remodeling woes and the Canadian economy. It was great fun and I totally recommend a visit if you are in the Calgary area.

Tuesday, June 01, 2010

1st Intermountain Spindle Camp

I am miles behind on reporting on the 1st Intermountain Spindle Camp at Lake Francis, CA. You can see my pictures here. Sharon, Heidi, and Birdsong have all blogged on the event. (Thanks, Birdsong, for the great review of my trailer! I love showing her off!) The brief summary of the events is that we all had tons of fun despite cold, rain, and hail. In fact, it was so much fun that we are already planning next year's Spindle Camp! I stayed behind and camped 2 more nights. What a great campground! It even had a restaurant that served a great lobster fettuccine! It was still a bit chilly for sitting around the campsite, so I took a few drives around the area to get in a little photography. The picture above is of the little Lake Francis and taken from a path down from the campground. I also visited the cemetery in Dobbins, and the old downtown area of Marysville. Driving home Tuesday, I stopped by the cemetery in Vinton. For photography, the Vinton cemetery is a bit disappointing, since it is so well maintained. (The tidy state of it says good things about the people of Vinton, but crumbling headstones are a bit more atmospheric.) I am still going through the images, so you will have to wait a bit before they debut on Flickr.

Thursday, May 20, 2010

Last big items....

Racing the clock to get the little trailer ready for her first trip of 2010, I needed to tackle the last two items remaining to make her renovation complete. Yes, I will always be adjusting and adding artsy touches, but the lack of flooring other than raw plywood made her look like a construction zone. I pondered long and searched the internet in vane for the right flooring solution. Several people recommended vinyl squares, and I did look at them, but they were all ugly refugees from the early eighties. Even as a temporary solution, I couldn't do that to my Blossom. I wanted something smooth, easy care, and dark brown to match the counters. I decided to paint the floor. Painted floors have long been a feature of summer cottages, so why not? Worst case scenario it would be an inexpensive temporary solution until I found something better.

Process: I wanted the rustic wood texture to show so I only slightly sanded the plywood. I primed with a coat of tinted primer, then applied 3 full coats of dark brown porch and deck latex paint (wow, that stuff is rubbery!). I just couldn't help adding a folkart flourish, so I used copper metallic artist acrylic to paint stars. Last I added 2 coats of spar varnish to seal in the stars and give a less rubbery surface.

I am totally thrilled with the result. It is way better than I expected and the copper picks up the other copper elements (lamps and backsplash). It might be too much for some folks, but for me it is perfect. Oh - the second finishing touch was to install a custom made (wood burned and painted, of course) set of coat hooks, that matches the custom painted cabinet knobs.

Now I'm ready to fill her up and hit the road!

Ruffles

I have almost finished my Ruffles scarf. The pattern is from the book Scarf Style, and I have been planning to make one for a long time. It turned out to be perfect travel knitting: simple enough for social knitting, yet with enough pattern to keep it interesting. The Yarn is Lorna's Laces Shepherd Worsted.

Thursday, April 29, 2010

Cabled Baby Hat to go with the Pembroke Baby Vest

I had extra yarn so I invented a hat to match the Pembroke Baby Vest. It turned out lovely and stretchy in the cotton, so I tried the same pattern (to test my written directions) in fuzzy handspun thick-and-thin alpaca. Very different look, much less definition of the cable twists, but still stretchy. I like them both. Hopefully the future owners will enjoy them and have toasty warm noggins.

PATTERN: Cabled Baby Hat

Light worsted (or thereabouts) yarn. Sorry, but I do not know specific yardage needed, but it is not much. The red yarn in the picture is "Cotton Supreme" by Universal Yarn Inc. The green is handspun alpaca at approx 11-12wpi.

Sized to fit an approx 14in head (0-6mos, so I hear)

Gauge: 10ss = 2" across cable pattern repeat on U.S. size 7 needles, but don't worry about it. Babies grow and the hat is likely to fit at some point (hopefully not mid-summer). I did not knit a gauge swatch and don't see why anyone else should have to either.

Needles: U.S. size 5 and 7 double points, plus a cable needle.
Also: safety pin to mark rows (optional, but very helpful)

Note: "*" on each end of a set of instructions means repeat these stitches until end of round.

Instructions:

Using smaller needles, cast on 70ss loosely using your stretchy cast-on of choice. (I used a long-tail cast-on.)
Join into round.
Rounds 1-8: *K1, P1*
Change to larger needles

Cable Pattern:

row 1 - *P2, K4, P2, K2*
row 2 - *P2, put 2 stitches on cable needle held to front, K2, K2 from cable needle, P2, K2*
rows 3 and 4 - same as row 1

Work 4-row Cable Pattern 5 times, ending with row 3. (Use the safety pin to mark the last stitch of each twist-stitch round (pattern row 2). This will make it easy to keep track of when the next twist-stitch round is due.)

Narrow for crown:

Round 1: *P2, K1, K2tog, K1, P2, K2*
Round 2: *P2, K2tog, K1, P2, K2*
Round 3: *P2, K2*
Round 4: *P1, K2tog, K, P2, K2*
Round 5: *P1, K1, SSK, P1, K2*
Round 6: *P1, K2tog*
Round 7: *K2tog*
Round 8: *K*
Round 9: *K2tog*
Pull yarn through remaining stitches and tighten.

Weave in ends. Give to baby.

Sunday, April 25, 2010

Baby things

Spring arrives bringing many things. In my case it brought a bout of flu. Oh joy. On a more upbeat note, it also seems to be bringing a surprising number of announcements of incubating little humans. Family, friends and co-workers are set to increase the population come fall. What's a knitter to do?

Last weekend (before the flu descended upon me) Allison and I drove up to Truckee and visited with Kelly at the Lake Tahoe Yarn Company. A very nice, stylish yarn shop and well worth a visit. I bought this oh-so-soft brick red cotton yarn to make the Pembroke Baby Vest. Previously I thought cables were a pain and hadn't attempted much with them. Turns out I was wrong! Cable knitting, so long as the pattern is charted, is addictive. I made the 6 month size, figuring it will fit the baby at some point. If I make this vest again, and I probably will, I will mirror image the cables so they meet the armholes a little neater.

Now back to bed...

Friday, April 09, 2010

Second Trailer Light

Remember the reading lamp I built for over the bed in my trailer? I needed to build a mate for it for over the desk. Where the wiring is installed above the shelving unit is not really optimal for a desk lamp. With both 12 volt and standard outlets on the desk, I really don't need a wall mounted desk lamp anyway. Instead I have built another copper-shaded light, this time more for ambiance lighting.

I found a sheet of embossing copper at Nevada Fine Arts. This was way easier to work with than the copper-leafing over foil that I used for the first light. This time I built the shade's hardware cloth frame in a simple retro-ish half column. I covered the hardware cloth with the copper, pushing it into the grid for texture. Between the two coats of metal sealer, I used a pushpin to poke holes in each of the hardware cloth squares.

From a functional point of view, it is a totally unnecessary light. Doesn't matter - I think it is cool. I especially like the sun pattern the light casts in the ceiling. And since the LED panel came from inside a boat light, I can even switch the light to red for a nightlight.

Now I only need to find the perfect flooring and she will be complete!

Saturday, April 03, 2010

Tadah!

Here is a grainy shot of my finished project! I will take better pictures tomorrow when I have some natural light. The before shot is here.

Removing the ugly turquoise paint (complete with brown paste wax) was a bit painful. My finishing job purposefully left the scratches and dents of age and use. The brushy paint job lets the wood grain (and leftover old paint in dents) show through. I used only 2 coats of varnish to protect it without giving it a plastic look. After painting I put back the original hand-cast brass hardware, using the original old screws.

Perhaps some future owner will be pleased to remove my paint job as ugly and inappropriate. Me - I like it very much.

Saturday, March 27, 2010

Still in progress...

Here's another detail shot of the work in progress. Not much knitting is getting done while I work on this. I do have a pair of socks that are almost done, though....

Thursday, March 11, 2010

Work in Progress


Here's a sneak peek of a work in progress. It is a pretty ambitious project, so stay tuned for more detail views as I work through it.

Sunday, February 28, 2010

Lighting Project


It has been a bit since I have done any work on the little trailer. All that snow and frigid weather has kept my focus indoors. One of the remaining projects after her renovation was to install a reading light above the bed. Much searching failed to find a 12volt light fixture that both ran on low voltage LEDs and didn't look too modern and/or plastic. I particularly wanted to have some textured copper to balance the beaten copper backsplash in the trailer's tiny kitchen area.

So I decided to build my own artsy fixture.

I purchased an inexpensive 12volt LED dome light from a boat supply store. The LED circuit board inside was the right size to fit neatly in one of the picture frames I had already wood-burned and painted. I used a piece of MDF the size of the frame as a base. I drilled a hole for the wires, then painted the edges orange and the face with iridescent gold paint. The iridescent paint is to help reflect the light out from under the shade. (Why gold? Because I had it on hand.) I varnished the board, then attached the frame to it with screws from the back. The inset in the frame meant to hold the glass made a neat slot to fit in the shade. I attached the LED board with its original screws and glued down the switch.

To achieve a textured copper shade, I built a frame out of hardware cloth. I covered the frame with heavy-duty recycled aluminum foil, being careful to cover the inside with the shiny side out to reflect light. I pressed the aluminum into the hardware cloth for maximum texture. At this point it looked pretty disappointing, but I pressed on anyway. I brushed sizing all over the outside of the shade, then applied copper leaf. It took about 3 applications since the texture made leafing difficult. When I reached the point of good enough, I coated the shade with copper sealant, and left it to dry overnight.

Here it is, screwed securely to the trailer wall. Having little experience with electrical things, it was indescribably satisfying to flip the switch and see the light come on!


Thursday, February 11, 2010

Michelin Man Mitts


Gauge: 18 stitches per 4 inches (4.5 ss/in)
Needles: U.S. size 7 double-points or size to meet gauge. (Either 4 or 5 needles, whichever is most comfortable), stitch holder or scrap yarn to hold thumb stitches

Yarn: I used softly handspun alpaca at 11 wpi. Any soft, fuzzy yarn that is pleasantly squishy at the gauge should work.

Size: One size fits most, since the mitts are very stretchy. Unstretched, mitts measure 8 inches in length and approximately 8 inches around palm. Adjustments can be made by casting on fewer or more stitches for a child's or man's hands, and adjusting the number of pattern repeats for length. I was able to try on the mitts for size as I knit them.

Abbreviation: LI = Lifted Increase: pick up the strand between stitches in the row below with the tip of the left needle (front to back) and knit through the back to twist the new stitch.

8-Round Stitch pattern:
Rounds 1-4: Knit
Rounds 5-8: Purl

CUFF:
- Cast on 32 stitches (loosely) and join in round, distributing stitches evenly between needles.
- complete 4 repeats of the 8-round stitch pattern (resulting in 4 purl welts)

INCREASE FOR THUMB GUSSET:
- Knit 2 rounds
- K1, LI, knit to last stitch, LI, K1
- Knit 1 round
- Purl 4 rounds
- knit 1 round
- k2, LI, knit to last 2 stitches, LI, k2
- Knit 1 round
- k3, LI, knit to last 3 stitches, LI, k3
- purl 4 rounds
- knit 4 rounds
- purl 4 rounds
- knit 1 round
- knit to last 5 stitches, put 5 stitches on holder, cast on 2 stitches to tip of right needle (I used 2 backward loops)
- add first 5 stitches to holder (total 10 stitches on holder), knit to end

PALM:
- Purl 4 rounds
- repeat 8-round pattern 4 times (total of 12 purl welts from very beginning of mitt)
- Knit 4 rounds
- bind off loosely

THUMB:
- put the 10 stitches from the holder onto 3 needles
- leaving a 5-inch yarn tail, knit 1 round picking up 3 more stitches from the gap at inside of thumb
- knit 1 round
- purl 4 rounds
- knit 4 rounds
- purl 4 rounds
- knit 4 rounds
- bind off loosely
- use the 5-inch tail to sew closed any gaps that remain around the base of the thumb.
- weave in remaining yarn tails.

NOW MAKE ANOTHER ONE.

Enjoy!

Sunday, February 07, 2010

Michelin Man Mitts

I had 2 balls of yarn leftover from knitting the Ridged Lace Cowl. These mitts are squishy, cuddly, hand-spun alpaca. They are very warm and the accordion pleats allow you to stretch them down over chilly fingers as needed. Pattern coming soon.

Saturday, January 16, 2010

Good words

I saw this sign above a display of mugs for sale at my local Starbucks. Although I knew it was a carefully calculated bit of corporate spin, I couldn't help thinking how aptly the words describe how serious spinners, quilters, knitters, weavers, woodworkers, potters, and other craftspeople approach their craft.

Thursday, January 14, 2010

New year = New projects

Here's a "before" picture of my next furniture-sized project. I found this cabinet at a cool shop in Tucson, AZ that specializes in large Mexican colonial pieces, antique and otherwise. As we wandered between 10-foot high old wooden doors, huge terracotta urns, and giant heavy wooden sideboards, I remarked that, although I loved everything I saw, I wouldn't be tempted since nothing would fit in my tiny house. No sooner than I uttered the words, we turned a corner and found this well-loved little cabinet. It is solid, very heavy (many thanks to Mim and Sharon who helped struggle it up my steps), and the perfect piece to hold up my TV. First I need to remove the faux-finish turquoise paint. Sharon and Mim were both insistent that I should keep the turquoise, but to me it is way too "southwest" cute. Plus, why faux-finish a piece that is already honestly old? Seems like a crime to me.


While I am considering the options, the cabinet is forming an impromptu kitchen island. Just another in-progress project, sitting on the in-progress kitchen floor, next to the in-progress kitchen table, surrounded by the cabinets needing sanding and wallpaper needing stripping. I sort of have a theme going.

Tuesday, January 05, 2010

Sabino Creek


Sabino Creek
Originally uploaded by Purple Fuzzy Mittens
Spent a glorious golden afternoon in Sabino Canyon Recreation Area near Tucson, AZ. Rode the shuttle, walked a bit, stopped at picnic tables to play games of Power Flinch, soaked in the 70 degree weather, and enjoyed time with family. Back to the frozen north soon.

Tuesday, December 29, 2009

Post-Christmas Reveal

First, someone has asked the status of my modular shawl, so I have decided to start each post (until it is complete) with the tally: 21 squares completed out of 45 so far.

The teaser pictures of work in progress were of a series of boxes I decorated to give to family members for Christmas. The presents have all been opened, so I can now share more pictures with you. These are cigar boxes that I "upcycled" by sanding, woodburning, painting and varnishing. You can see a gallery of close up images, along with a few shots of my work area, HERE. These boxes took more hours than you might expect, but I think the results are worth it. I like them, anyway. I was not able to make enough for my numerous family, so those who didn't receive hand-made gifts can look forward to something special next year.

A final note to wrap up the Name-the-Bear issue: Despite the many suggestions (both online and off) inspired by his flight jacket, I do plan a change of attire and Laura's suggestion of Seamus has won. Winston was a close second. I will be sure to post a new picture when I get around to knitting him the sweater.