Sunday, July 30, 2006

Needle Woven Stuff

Another past-project interlude:

A few years back I was fortunate to be able to take a workshop from Sarah Swett called "Tapestry on a Box". I had seen her article called "Weaving on a Box" in the Winter 1997 Spin-Off and was anxious to try it myself. It was a great workshop and I ended up making an interesting little bag, to which I added rings and a strap. I particularly liked the technique of using eccentric weft to create a sort of freeform flow to the color segments.

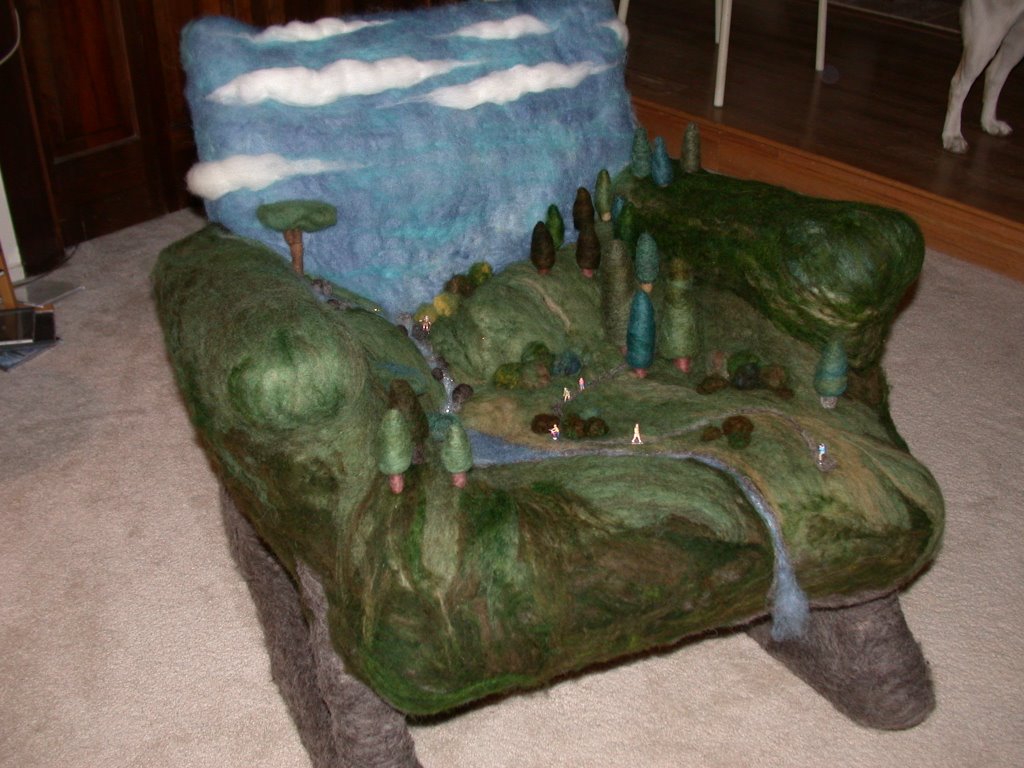
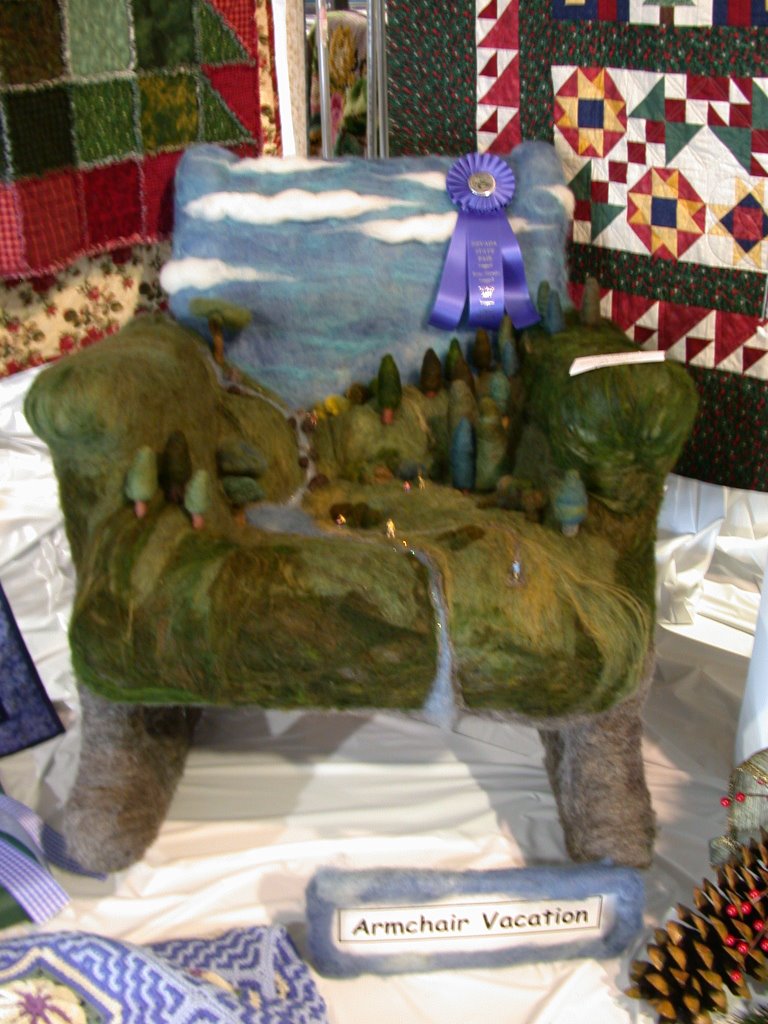
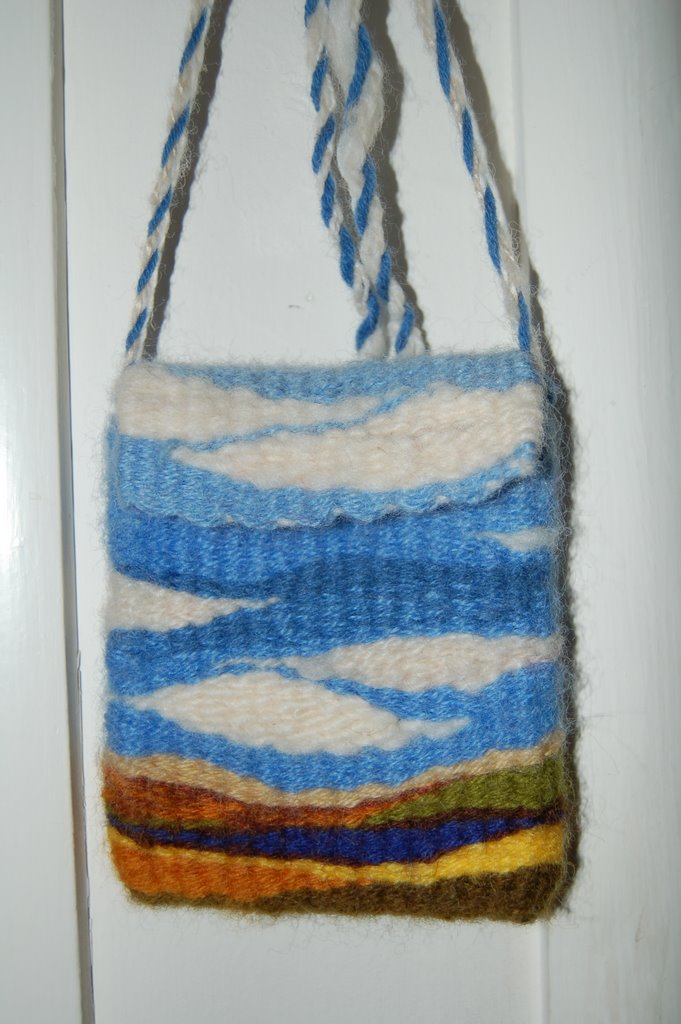
Sometime later I was asked to do a workshop on textiles for a troop of Girl Scouts. In addition to kool-aid dyeing yarn, and teaching them to identify what is a textile vs. what isn't, each girl wove a small pouch around a cardboard loom. To prepare for the workshop I created a sample pouch. I used misc. ends and bits of handspun, and wove a sort of landscape, inspired by the lake filled Washoe Valley, south of Reno.

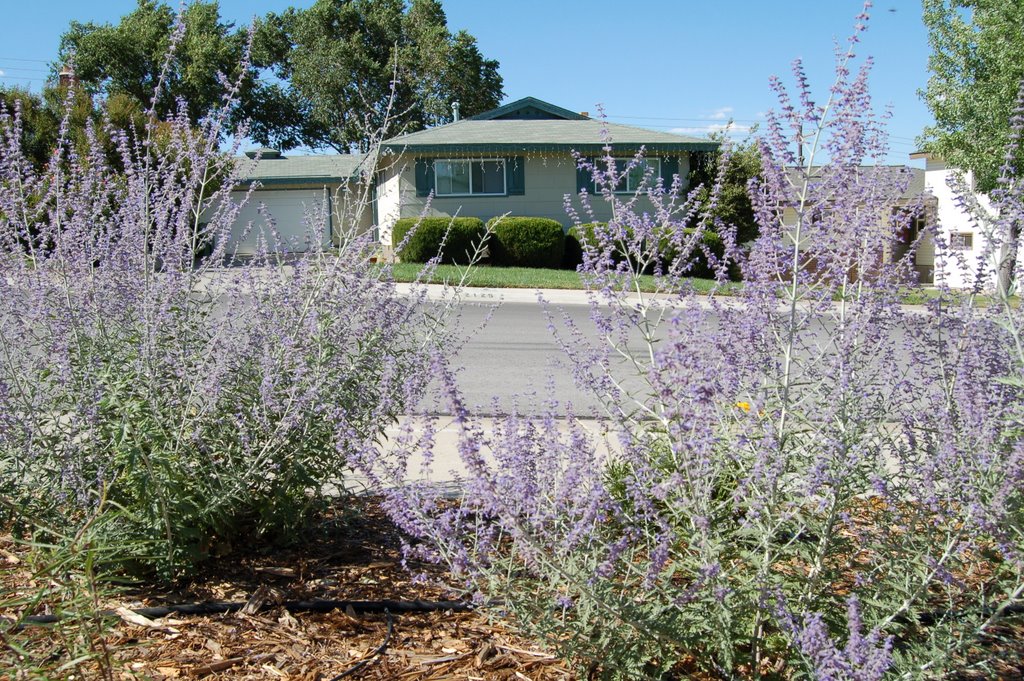
I used this same technique to solve an organizational quandry at work. I needed something to hold a stack of my business cards that could be attached to the wall just inside my office door. An envelope taped to the wall was just a little too mundane for me. So I wove a small pouch around a piece of cardboard. I stuck the hook side of Velcro tape to the wall, and just pushed the pouch onto the velcro. It works great and adds a touch of uniqueness to my office.

Soon I hope to get around to weaving a mousepad.

Thursday, July 27, 2006

Another Kiwi Update


The painting of the Kiwi parts is coming along. I have finished painting the background colors on each part, except the wheel. The picture shows just some of the bits, so you can get an idea of what it will look like. The purple paint reminds me of a never ending purple dye pot I once used (and used and used...). A little goes a really long way. I really like the way the treadles are looking.

My one attempt at watercolor

As a companion piece to Sharon's latest blog entry, I present to you my one and only attempt at watercolor painting since 5th grade. It was based on a photo I took in the same spot as Sharon's photos, only about 2 years ago. I may yet take up and learn watercolors, but there never seems to be enough time between work, home improvement, gardening, and the necessary-for-my-sanity fiber pursuits.


Here is the photo.

Tuesday, July 25, 2006

Needle-Felted Chair, the Sequel

Kiwi painting is going very slowly, so I thought I'd take this time to tell you about the second art chair. Last July the Friends of the University of Nevada, Reno Libraries held a charity event to raise money to go toward building the Knowledge Center (AKA the New Library). The event was called Chair-i-ty. A bunch of the campus' vintage lecture hall chairs were given to local artists to decorate and be auctioned. Since the event coordinator knew about my first art chair, she asked me to participate.

After the trouble we had offloading the first chair, I had sworn I would never do another one. I gave in based on the fact that this one was guaranteed to go away at auction.

I came up with a design inspired by Van Gogh's painting 'Starry Night'. This chair was a little trickier, since I needed to attach the felt to the wood chair somehow. After some experimentation, I solved this problem by making thick batts on my drum carder and attaching them to the chair with spray adhesive. Then I could needle felt into the batts. I went through a bunch of felting needles until I perfected a method of felting at an extreme angle without jabbing them into the wood. It is hard to tell from the picture, but I used many different shades of blue wool and alpaca, plus white alpaca for the swirls and kool-aid dyed yellow wool for the stars. Since the stucture of the chair was left intact, complete with tab arm, I named the chair "Night School".

Like the first chair, everyone who saw the chair had to touch it. The night of the auction I brought felting needles to the event to make last minute repairs from all this abuse. About 50 chairs were auctioned and mine was the only completely fuzzy one. At the end of the evening, the same folks bought this chair that had bought the first one. They now have a collection. I hope they never get moths!

Sunday, July 23, 2006

End of the Weekend Update

It has been a busy and really hot weekend. I put some serious energy into the yard and managed to dig out about 25 square feet more of the grass. It doesn't look like much in the picture, but believe me, I transported large amounts of dirt and sweat into the bath after each session of digging. One lovely thing happened: The neighbor across the street came over to chat and has asked for information about where I have been ordering the desert plants from. She likes the plants in my yard and is considering putting in some similar landscaping on the east side of her house. A definite victory for environmentally sound landscaping!

I haven't gotten as far along on the Kiwi painting as I planned because it is so warm in my non-airconditioned house that the paint was drying too fast to be very workable. I did get some done, though. As you can see from the picture, I am having trouble applying it evenly (and staying outside the lines). Applying a second coat is helping, but it will always be ...well... let's just say folk art. I guess it is officially "Outsider Art" since I am not professionally trained. The less favorable, but accurate, description is "really amateur". Ah well, I did say I was going more for outrageous than for refined! By the time I add the other colors and several coats of a satin finish, it should look like I meant to do it that way.

Friday, July 21, 2006

Kiwi Phase I Complete!

Tonight I finished the wood burning phase. All pieces are now covered with vines and snakes, even the tension knob! It has been stinkin' hot this week, so when I look back on this project, I'll remember hours of sweating over a hot wood-burning tool.

Tonight the week of 100 degree temps climaxed in a magnificent thunderstorm. The lightning has moved on, but the windchimes are still clanging loudly and there are occasional patterings of big, fat raindrops on the metal porch roof.

Tomorrow, after a necessary stint in the garden, I can dive into painting. Currently I am thinking purple for the wheel, blue for the frame and mother-of-all, yellow for the footmen, and red for the treadles. And of course green for the leaves and contrasting colors for the snakes and flowers. If this works out well, I may start burning all kinds of things. I already want to do a kitchen table, and maybe the door to my fiber room. For those, I think I'll wait for cooler weather.

Tuesday, July 18, 2006

Chair Art, first time around

Sharon says I absolutely must tell you about a few of my past projects, so occasionally I will pull a memory or two out of the vault. The most commented on of all my ..er.. art pieces are the chairs. Way back in 2003, the Nevada State Fair announced it was having a Chair Art contest. I immediately thought of all kinds of textile-ish things to do to innocent, unsuspecting chairs. Allison Judge, aforementioned fiber goddess and artist extraordinaire, and I decided to work together on an entry. The idea was to needle felt an entire sculptural landscape onto a chair. Allison had taken a needle felting workshop, so she provided the technical expertise. I had never touched a felting needle before, but had that enthusiasm that can come from total ignorance of the process. I also had an old porch rocker frame languishing in my garage. First we "upholstered" the frame all over with towels and anything else we could think of that was squishy. Then we dove in with sharp-pointy needles and a box of bandaids (my, those needles are sharp!). Allison mixed up lots of green dye and threw in wool, mohair, and whatever else we could find in the recesses of our fiber stashes. I also had lots of blue mohair left over from an indigo dye day. White cormo roving made fabulous fluffy clouds. While I provided general landscaping, Allison took on the role of Master Shrubologist. The inspiration was to recreate a valley in the Sierras on a pretty summer day. We even added a sparkling stream (the only real use for glitz fiber) and a hiking trail. The finishing touch was a collection of HO railroad-scale hikers that we pinned in along the trail and a sign proclaiming the name of the piece: Armchair Vacation.

We won a lovely blue ribbon. During the fair the chair was displayed directly across from the spinning guild's booth, so I was able to witness a continual parade of folks who couldn't help from reaching across the rope to touch or stroke the thing.

That was just the beginning. During the months after the Fair, the Chair became more of a hassle than a joy. Both Allison and I have cats which meant that niether of us could take it home. At first it lived in my office. That became untennable since not only did it take up too much room, but complete strangers kept walking into my office to gawk at it, and of course, touch it. It began to look a little the worse for wear. Next it went to live in the front window of La Bussola, a cool little artsy shop, but it never sold. Finally it went into an auction to benefit the Friends of the University Libraries. I understand it now lives in the guest bathroom of the Dean of the School of Journalism. Must be a big bathroom.

Sometime, I'll tell you about the second chair...

Sunday, July 16, 2006

Another quick Kiwi update

Despite the hundred degree weather (and no air conditioning) I pushed forward and have now completed burning patterns on every piece except the wheel. I am really happy with how it is turning out. I have had several folks ask me "but why snakes?" or just plain tell me that they don't like snakes or find snakes unpleasant. The snake motif is being used because: a.) snakes are easy to draw, b.) snakes are unexpected, c.) snakes don't look really odd in colors such as blue or purple, and d.) I rather like snakes. Just remember, if there were no snakes we would be up to our asses in mice.

Saturday, July 15, 2006

Let their inner poodle run free

I have never understood the American passion for planting shrubs then trimming them into soulless little poodle shapes. Of course I know that the art of topiary goes way back in Europe and Asia, long before the American lawn-plus-shrub culture was even considered. But growing topiary is an art all about careful culture, not about hacking any shrub down to a squat sphere. Maybe it is a symptom of a need to feel in total control of one's environment. I have other thoughts about this, but probably should avoid making sweeping statements about the general American psyche.
Here is a view of my neighbor's yard, seen through my Russian sage. As you can see, she has a very different approach to gardening than mine. When I bought my house 4 years ago, it came with lots of poodle-bushes, carefully lined up at equal distances from each other like little soldiers. I have removed most of them.
The remaining shrubs have been encouraged to grow haphazardly in any direction they pleased. At first they just looked shaggy, then their individual personalities started to come forth. Here are 2 that are now looking nice and unconstrained.


Unfortunately, not every shrub knows how to break out of its formal mode. The bush at the front corner of my property just refuses to spread out and quite probably will never adopt a happily casual look. It certainly looks ill-at-ease with my desert plants. Perhaps it can't relax because it knows I have ambitions to remove it.

Friday, July 14, 2006

Blue Sky Baby Sweater

None of my numerous neices or nephews have begun to begat, so I seldom have cause to knit baby things. Because they are small, baby things are about as close to instant satisfaction as you can get, short of knitting socks. Since I have limited experience with babies, but know they don't follow standard sweater proportions, I looked for a pattern. Allison, Fiber Godess and store manager at Jimmy Bean's Wool in Reno, suggested the Blue Sky Organic Cotton baby sweater pattern. I do believe this is the only time I have both followed a pattern and used the suggested yarn. I really like the stitch pattern, even though the photo on the pattern makes the baby look a bit like the Michelin Man. It knitted up fast and didn't require any more blocking than a toss in the wash and dryer.

Wednesday, July 12, 2006

Kiwi Project Update

Here's a quick update on my progress from the last few days. I am in the burning phase. I plan to tackle all the miscellaneous pieces first, and the actual wheel last. So far it looks a bit as if I am creating a 3-D coloring book. Burning complex patterns on wood with corners and curved bits is prooving to be challenging. Especially if you are also fending off feline intervention. It's a good thing I'm not a perfectionist! Any wobbly lines or jagged elements will just add to the charm (that's my story and I'm sticking to it).

Tuesday, July 11, 2006

Fabulous item from a fabulous friend!

My aging eyesight now requires separate eyeglasses for separate tasks, including a pair dedicated to computer work. My fabulously talented friend Linda makes deliciously soft and fuzzy mohair yarn using kid mohair from Sierra-Tahoe Angora Goats. She dyes the locks in all kinds of colors then blends them together and core-spins them to make fuzzy-lumpy-unique yarn. Since I worried about plunking down my glasses over and over on my glass-topped desk, Linda knit for me a lovely fuzzy square to nestle them in. The picture does not do it full justice because the kid mohair is so fine that my camera's autofocus couldn't focus on it. It has become quite the centerpiece to my desk and the envy of many. Everyone who visits my office wants to pick it up and fondle it. Many thanks, Linda!

And now for a bit of gardening....

When you buy a pre-owned home you get a pre-owned garden. My 1956 house came with a fabulous, but overgrown lilac, an ok, but overgrown mock orange, a few trim-me-into-a-mutant-poodle shrubs, and way too much yellowing, thirsty lawn. I bought in April and by July I had a $200 water bill. My plans for an eventual xeric landscape were suddenly moved up. That was 4 years ago. My progress is excedingly slow, but coming along. About 50% of the front lawn has been dug out and replaced with lavendars, russian sage, salvias, and other xeric perennials. I also planted 3 curl-leaf mountain mahoganies which should eventually grow into small tree/large shrub status.
Along with the poodle bushes, I inherited two specimens of a weird-ass looking species. Here is the larger of them, currently in bloom. The flowers are daisy-like, yet the foliage is absolutely not daisy-like. It took me a while to figure out that it is Lingularia X palmatiloba, otherwise known as "leopard plant". The reason it took so long to find is that it is a bog plant. Now I ask you, who would plant a bog plant in the desert!? It was a bit anemic looking at first, but really took off when I added it to the drip system. Eventually it needs to be dug out and moved into the back yard, next to the (someday) fish pond.


I hope to replace them with Lena's brooms (Cytisus scoparius 'lena'). I have one already and it is briefly stunning every spring.

Monday, July 10, 2006

We have color!

After exploring many bad options, the folks at Nevada Fine Arts introduced me to something called matte medium. I also learned that depending on the color, artists' acrylics come in transparent, semi-transparent, or opaque. Matte medium is a transparent base that can be mixed with the acrylic paint to spread out the pigment molecules without thinning the consistancy. The more matte medium you add, the more transparent a color you get, especially if you start with a paint that is already listed as transparent.

My first experiment was a total bust. I didn't add enough medium and I ended up with an evil dark, almost opaque, purple. Hopefully noone will look at the bottom of my bobbin-rack-to-be. After that I went to town, using about 70% medium. That mix allows the burn lines to show through nicely. The only limitation is that the paint doesn't go on very evenly. You can see this in the purple piece. I am preferring to think of this as a folksy look. Leaving off the paint would accomplish a more refined product, but my aim is to get something more outrageous than refined.

Tomorrow I buy a lot more medium and some additional colors.

Sunday, July 09, 2006

More Kiwi Drama

I went looking for second opinions. The magic of second opinions is that if you ask for enough of them you will actually get the one you wanted to hear. I found a knowledgable sort who said that it would be OK to wood-burn on MDF, as long as I did it outside or in a well-ventilated area. However (there is always a however) the MDF might melt before it burned, and even if it did burn, it probably wouldn't burn evenly. I set out to test this. First I needed a piece of scrap MDF. This turned out to be trickier than it sounds. The saws at both Home Depot and Lowe's were broken and it is hard to take home a six-foot piece of lumber in a Miata. Eventually, the folks at Lowe's found a broken piece for me.

Here is a picture of my test burning. Not as nice as burning on wood, but it will work. After all, the wheel will be turning most of the time, right? Pretty stinky, though. After that I launched into burning other stuff.

Here's all the stuff I have done so far. The box-like thing is the cover to my doorbell. As you can see, I am going for a primitive, folk art look. My inspiration is the bright-colored Mexican folk art I remember from growing up in Tucson. The motif for the wheel will be vines and snakes. I am still working on a source for the color.

Thursday, July 06, 2006

Kiwi Project hits a setback already

My plan was to use a woodburning tool to burn patterns all over the wheel's parts, then stain the wheel fancy colors. My plans hit bottom when I did a little research today and found out that performing pyrography on MDF is a major no-no, since it releases toxic chemicals. That, followed by further research that indicated that standard wood stains do not work too well on MDF, was quite a disapointment. Time for Plan B.....


Just in case I continue with the woodburning plan on the hardwood parts (everything except the wheel) I did a little practice. This is a simple pattern I burned on the bottom of the somewhat useless kate that came with the Kiwi. It is somewhat useless because it is not tensioned and is too light to stay in place. No great loss if my burning turned out too embarrassing to show in public. If it turns out nice, it can hang out as a decorative bobbin stand. The burning went fine. This weekend I'll get some stains and paints to play with.

Wednesday, July 05, 2006

And now begins the Great Kiwi Project....

My Kiwi has come!! (As you can see, Clara is excited, too.)

I went to Black Sheep Gathering with no expectation to even consider buying a new spinning wheel. Then I saw Janis Thompson's wildly painted Ashford Kiwi. She kindly allowed me to try it out and a new obsession was born. Not only was the wheel a cute little thing, but it would fit in the passenger seat of my Miata, without putting the top down. (My Ashford Traveller fits, but it can only be inserted or removed by taking down the top.) With the optional high-speed flyer, the wheel can reach 14:1, which is plenty fast for spinning at guild meetings or demonstrations. Most importantly, it is relatively inexpensive, and comes as an unfinished kit - perfect for doing a bit of customization. My plan is to treat it as an art project and decorate every inch of the thing!

I ordered my Kiwi from the fine folks at Woodland Woolworks. When the box was opened it revealed many bits and pieces. This is going to be quite a project! I hope to debut the finished wheel at the Nevada State Fair in August.

Dye Day!!

The 4th of July was Dye Day. The most successful dye days are gatherings with no more than 2 people per burner and dye pot. Don't get me wrong, I have been to Everyone's-Invited dye days and workshops, and they are a lot of fun, but from those you go home with enough dyed material for maybe a sock or hat. A true working dye day is one that ends with pounds of colorful stuff filling all your clotheslines and sweater dryers. Yesterday was just such a day. Despite it being hot, windy and dusty out at Sage Creek Farm, we spent almost 8 hours immersing and painting and anything else we could think of doing to fiber. Sharon even tried some natural dyeing with lupine that she collected from the desert around her farm. We only stopped for hot dogs and rootbeer (Thanks, Ian!).

Unless you are terribly disciplined and math-inclined (which I am not on weekends and holidays) dyeing can yield all kinds of surprising results. For instance, on past dye days I have tried to achieve wonderful reds and oranges, and ended up with pink. Lots of pink. Several friends of mine have been the happy recipients of cheery pink roving. Have I mentioned that there is only one color that I don't like? Pink...ick.

Here are before and after shots of some handspun merino that I painted dye on, wrapped tightly in clingwrap, and steamed for about 30 minutes.
Yesterday's color of the day was teal. I had brought along a large Aquafina bottle filled with dye liquid from a dye day several years ago. It had been cluttering up my garage since then and I wanted to move it along to a better place (anywhere other than my garage). This turned out to be amazingly giving dye. When we mixed it with other colors, the teal overwhelmed. When we painted it on roving with other colors, it spread to dominate. And when the finished fiber was rinsed it bled teal and bled teal and bled more teal. At the end of the day there was still lots of teal dye left. I strategically left it behind to occupy Sharon's garage for future teal fun.

Here is a group shot of my dye-day booty:
The pea-mush stuff in the colander (not the color I was aiming for) is alpaca, and it is taking much longer to dry than the wool. Perhaps I can blend it with some other color...

I'll be sure to let you know what these now-colorful fibers grow up to be. At the end of the day I had a bunch of new (mostly teal) stuff in my stash and a teal ring around my bathtub.

Monday, July 03, 2006

Lavender, lavender, and more lavender

I have become a great fan of lavender. Not only is it a great moth deterent, and beautiful to behold, but it requires almost no water and loves living in the high altitude desert of northern Nevada. Last year I planted eight or so plants: half Lavendula X intermedia 'Grosso' and half Lavendula X intermedia 'Provence'. The Provence took off, grew tall and bloomed most of the summer. The Grosso stayed exactly the same puny little size, but did not die. This year the Provence expanded and is covered with exuberant purple flower salks. The Grosso, who aparently needed an extra season to get going, have come into their own. As soon as it warmed up they grew rapidly, and if not as thick and tall as the Provence, they are coming close. In my happy enthusiasm, I ordered again from my favorite purveyor of high-desert plants, High Country Gardens. Thursday I received a box of 10 more Provence, 10 more Grosso, and 3 Salvia reptens (West Texas Grass Sage). Saturday morning I dug 23 holes and planted the 23 plants. Saturday evening I expanded the drip system to reach each of the new plants. (Hence my previous post about drip watering systems.) I have an ambition to look out my front door on an entire front yard of blooming lavendar mixed with shrubs of Russian Sage and Caryopteris and other blue and purple flowering desert plants.
To offset all that purple I have added bright yellow blooming Coreopsis grandiflora 'sunray'.

My neighbors are mostly of the green-carpet lawn and rose bushes persuasion, so I am not sure that they are entirely with me as I slowly progress toward my desert ideal. When I dug the initial path through the lawn-that-would-not-die, I had many polite enquiries as to whether I had plumbing issues. Just recently, a neighbor strolling by asked when I plan to "get the yard under control". I just smiled and said, "Oh, one is never done with a garden." I figure as water prices rise and my desert garden keeps blooming at 100th of the water used to keep a lawn green, folks will start to see my point of view.

Next year I think I'll add in some Lavendula X intermedia 'Alba' which blooms white.

Sunday, July 02, 2006

Up to my eyebrows in Icelandic wool

I have enough Icelandic wool for a lifetime of spinning. If you have never seen an Icelandic sheep, take my word for it - they are quite cute little sheep and come in a wide range of cool natural colors. In fact a single Icelandic fleece can be several wonderful colors from moorit to grey to white. One of the members of my spinning guild raises Icelandics (Walker Forks Sheep Camp) and she routinely invites us all down on shearing day. What can be more enticing then choosing a multi-colored fleece while it is still on the back of a small cute sheep, then watching them shear it just for you? The result is a closet filled with Icelandic fleece, waiting to be spun. Now Icelandic sheep are a primitive, double-coated breed, with a soft undercoat and a coarse outercoat. Unless you use wool combs or a hackle to seperate out the shorter soft undercoat, your spun yarn is going to be, ..well... Let's just say outerwear only. A hackle is a set of sharp tines that you clamp to a table and run locks of the fleece through. Felting needles are dangerous enough for me, and I hate to test my insurance too far. So I have the fleece washed and carded into roving. And more roving. And more roving. In pure self defense, and knowing my own weakness, I have stopped attending Helen's shearing days. Right now I am trying to clear up a small corner of the closet by spinning up at one of the many fleece. What will the yarn become? Outerwear, no doubt. Perhaps it is time to start weaving rugs.....

Here are the early results of the fleece I am spinning. It is moorit (brown) Icelandic lamb fleece, washed and carded into roving by Stonehedge Fiber Mill, that I overdyed green to get a nice mossy color. I am spinning it fine and plying it off a tensioned kate to make a 3-ply yarn that is sort-of DK weight. I still have a mountain of it to go. Then I will have a mountain of 3-ply DK-weight itchy yarn to make something out of. It should show a cable pattern nicely...

Here is another picture of it with Zach for scale.

Saturday, July 01, 2006

Drip...drip...drip...


During the last year I have learned a lot about installing and maintaining drip watering systems. For instance, did you know that corners and tees from Home Depot do not fit hose from Lowes, despite the fact that they say they are the same size? I mapped out the initial system for the front yard using all the recommended tricks. I carefully laid out hose in a circle around the outer edge and linked it into a closed loop to equalize the pressure. I used Ls and Ts to fit all the corners neatly. I installed the timer. Then I triumphantly turned it on. Fountains streamed up from every T and L. That was my first expensive lesson. Rebuilding the entire thing from parts from one store was, well, a bit of an effort. Much muttering was involved. The second lesson came when I neglected to plan ahead for winterizing the system. Once corners are installed they can only be cut off. The result is a system that gets several inches shorter each year. Additionally, The brass multi-spigot thing that allows use of both drip and hose froze and cracked right in half (luckily the spigot itself didn't blow). Next, my mail carrier (who always cuts across the yard) tripped over the exposed drip hose, and left it all dragged out of place. I burried all parts in her path and installed flagstones all along the mail delivery route, to remind her not to stray. The most recent, and soon to be most expensive lesson occured Saturday. Now anyone who has installed much drip probably knows that the easiest way to force the fitting into the 1/4" hose is to chew on the end of the hose to soften it (blowing off any clinging mulch first). I am here to tell you that that is NOT recommended if you have any fillings. On the plus side, I did need to find a new dentist.

Tomorrow I start installing drip in the backyard.

Fiber Haiku

fuzzy purple wool
what do you want to become?
spun smooth and knit soft

I'll start with Black Sheep Gathering....

Going to a wool festival is not only tons of fun, but it can really jumpstart flagging creativity. One of the best wool festivals in the west is Black Sheep Gathering. I carpooled up to Eugene, OR, with 2 friends and fellow guildmembers and the traveling was just about as much fun as the Gathering itself. Part of the whole experience. We camped out at a friend's farm (Finney Creek Farm), and drove into the Fairgrounds each day. It would be easy to take up all of the days with workshops, but I knew from past years that there is a lot more to see and do. So I took one day of workshops and saved the other days for watching the sheep showing, checking out the fiber arts entries, watching demonstrations, and, of course, shopping. BSG has about the best set of vendors possible and the market area is filled with irresistible fibers and equipment and all sorts of other sheepy things. When planning the trip, the three of us sharing a vehicle carefully puposefully packed light in order to leave lots of room to bring home our booty. I took 2 workshops on rughooking, so I was all set to bring home a whole new class of stuff. The one thing I was not in the market for was a new spinning wheel. One should never make grand statements about what they are not going to do; my new wheel arrives via UPS on Monday. I am inspired to make an art project out of it. I'll talk all about that project in another post. So... if you plan to go to a fiber festival, I recommend traveling with friends, leaving lots of time to see everything, traveling light to have maximum space for your purchases, and if all else fails, remember that most vendors will ship.